Using Paraview in LCRC
Paraview should not be launched on the login nodes of Improv, and it is set up to work in client-server mode. Users must follow the procedure outlined below to use Paraview on Improv from a local machine running Linux/MacOS.
Lines with % denote commands, highlighted portions show what the user is expected to see. Commands are shown for ilogin1 and should be changed appropriately if you are using other login nodes. Documentation shows the current version of Paraview (5.13.0) on Improv. The procedure would be the same for later versions as well.
On Improv
$ module load paraview
$ which pvserver
/gpfs/fs1/soft/improv/software/custom-built/paraview/5.13.0/bin/pvserver
$ pvserver  --server-port=11113
Waiting for client...
Connection URL: cs://ilogin1.lcrc.anl.gov:11113
Accepting connection(s): ilogin1.lcrc.anl.gov:11113
On Your Local Machine
On your local machine make sure you have the same version of Paraview as that on Improv (5.13.0 in this example)
Open a new terminal on your local machine/desktop (Mac/Linux)
$ ssh -L 11113:localhost:11113 -o ProxyCommand="ssh -W %h:%p [email protected]" [email protected]
Change “username” in above command to your username on LCRC
On your Mac/local machine launch paraview
Set up the connections from Paraview
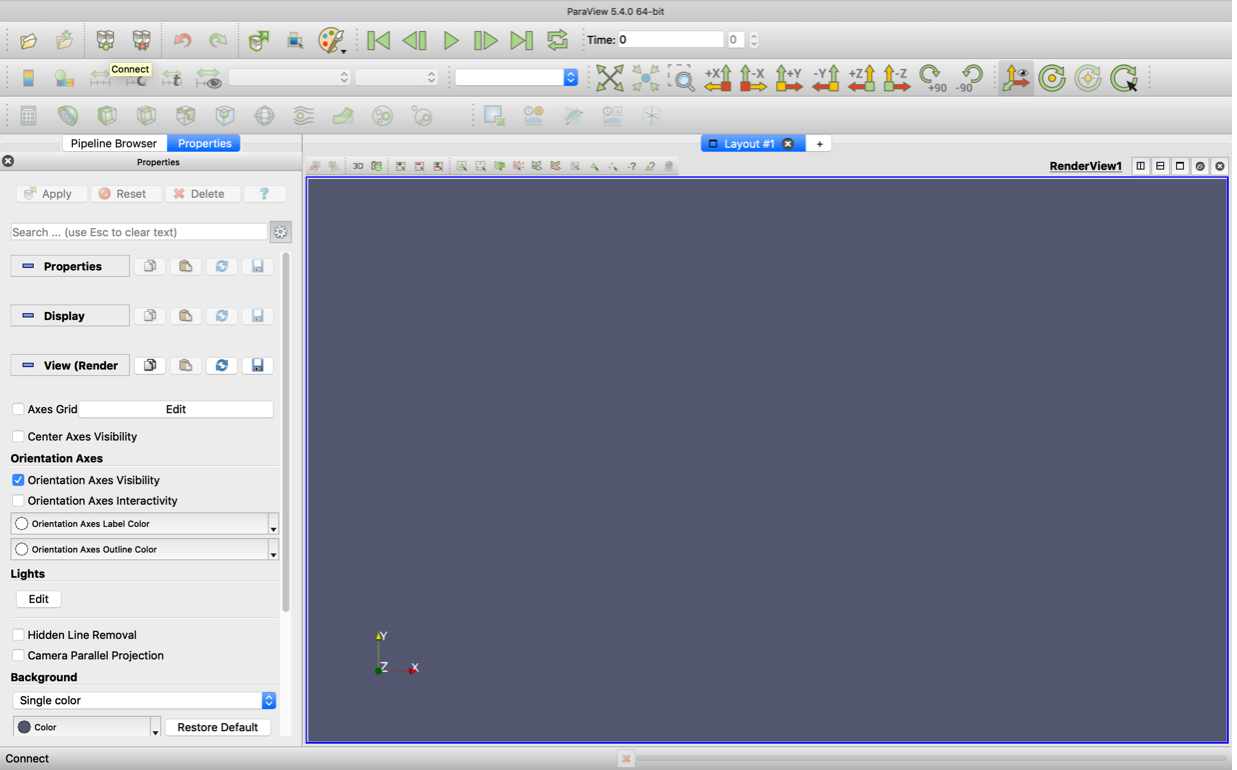
Click on the icon for connection (marked in red) in the figure below and then click on the “add server” tab.
Click to view screenshot
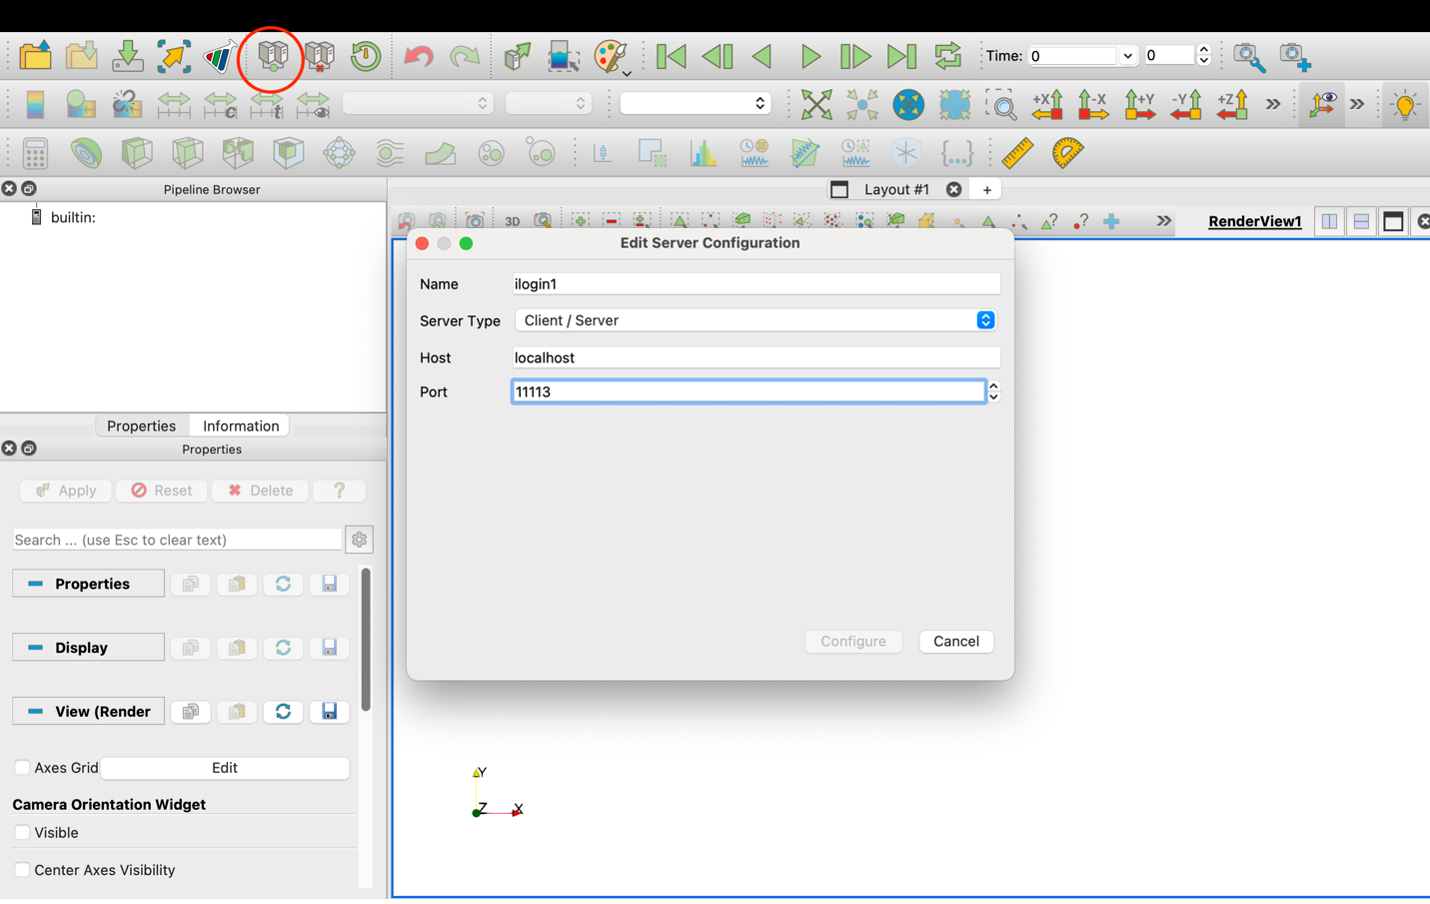
Fill in the details as shown above - set name as one of the login nodes, ilogin1 in this example and hit configure. The port number should match the port number you used in the pvserver command shown earlier.
This will take you to the next tab where you can hit save and save the configuration (startup Type is Manual which is the default setting).
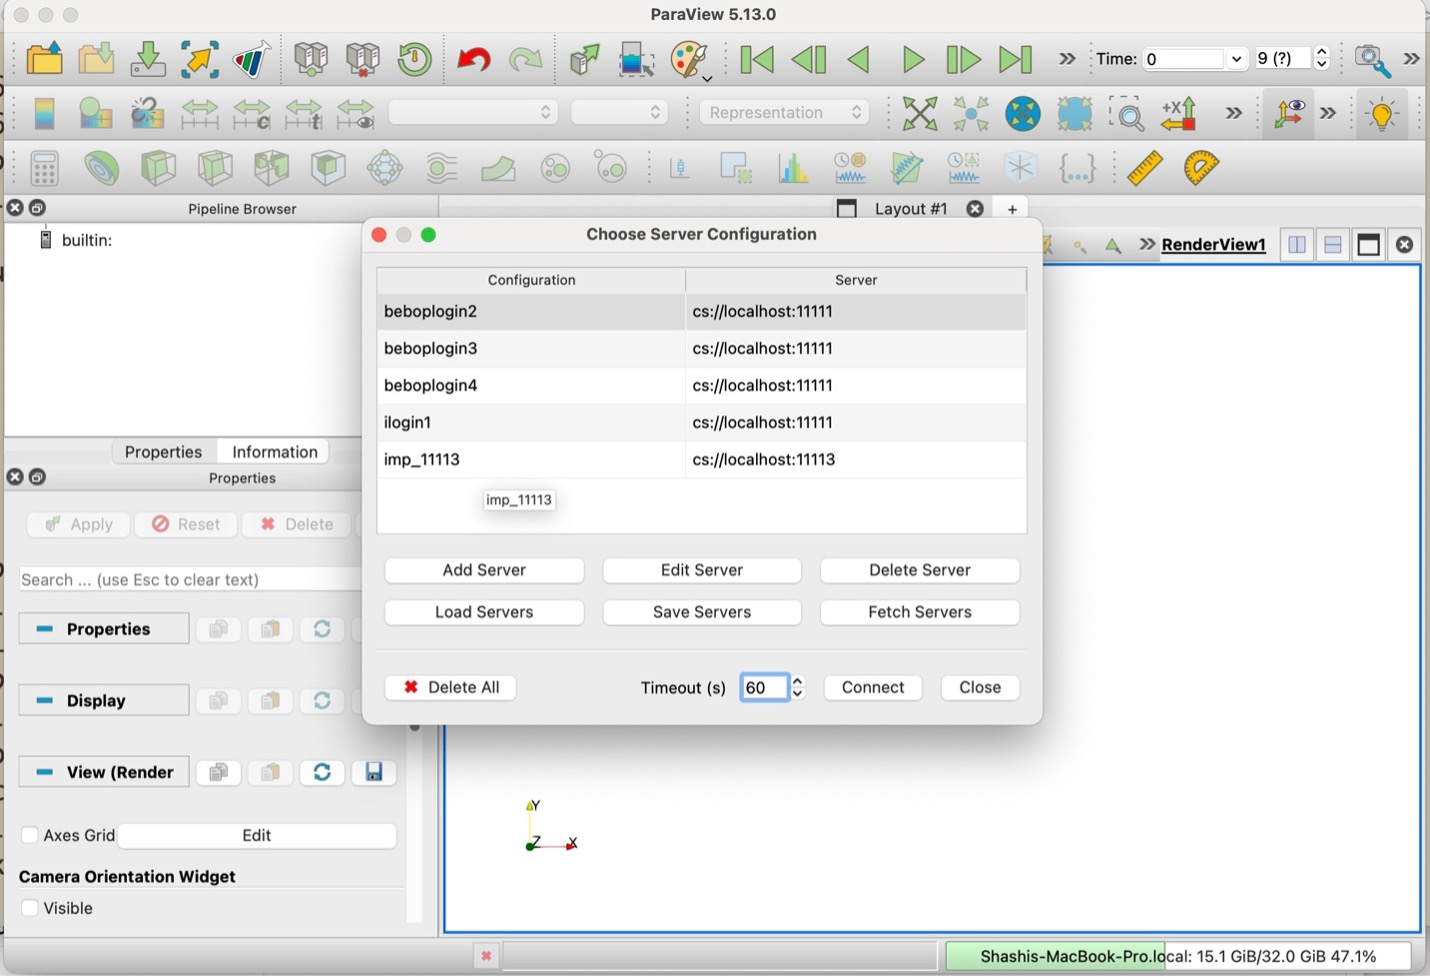
After adding a server, you should see a panel as shown below. You could add multiple servers using the above procedure. Click on the server name where you have started pvserver (in this example it would be imp_11113) and hit connect.
Click to view screenshot
Once connected, you should be able to navigate to your case directory on Improv. Open case file by clicking on the icon marked in the red circle below.
Click to view screenshot